How to Add the lang Attribute to the Root of your Next JS Website without _document.js

Written by Kolade Chris | Dec 21, 2022 | #Next.js #React | 1 minute Read
The lang attribute is not available by default in Next JS. And unfortunately, it’s not a good thing for accessibility not to have the lang attribute in the root element of your Next JS app.
And if you want to write less code as possible like me, then creating a whole file in _document.js to add the lang attribute to the root HTML element of your Next JS app might be an overkill.
If you decide to do it with the _document.js file, this is how it’ll look:
import Document, { Head, Html, Main, NextScript } from 'next/document';
class MyDocument extends Document { static async getInitialProps(context) { const initialProps = await Document.getInitialProps(context); return { ...initialProps }; }
render() { return ( <Html lang="en"> <Head /> <body> <Main /> <NextScript /> </body> </Html> ); }}
export default MyDocument;To me, this is too much code. That’s why I’ll show you how to add the lang attribute to the root element of your Next JS app with the built-in next.config.js file.
How to Add the lang Attribute to your Next Website with the next.config.js file
Head over to your next.config.js and add this object:
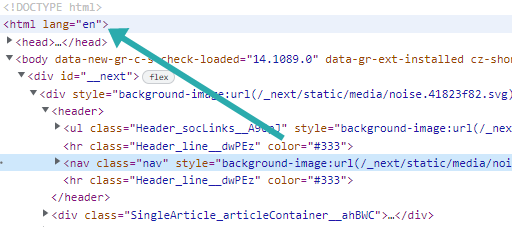
i18n: { locales: ['en'], defaultLocale: 'en', },Save the file and restart the server so this can reflect. The en value of the locale key represents the value your lang attribute will have.
By the time you inspect your website, you should see something like this:
Thank you for reading. If you find this article helpful, kindly share it with your friends and family.
